Problem Set 7
Part I due by 11:59 p.m. on Thursday, April 2, 2026.
Part II due by 11:59 p.m. on Sunday, April 5, 2026.
Preliminaries
In your work on this assignment, make sure to abide by the collaboration policies of the course.
Don’t forget to use docstrings and to take whatever other steps are needed to create readable code.
If you have questions while working on this assignment, please
come to office hours, post them on Piazza, or email
cs111-staff@cs.bu.edu.
Make sure to submit your work on Gradescope, following the procedures found at the end of Part I and Part II.
Part I
Creating the necessary folder
Create a subfolder called ps7 within your
cs111 folder, and put all of the files for this assignment in that
folder.
Problem 1: String-method puzzles
20 points; individual-only
This problem will give you practice with using the methods that are inside every string object.
Begin by downloading this file, putting it in your ps7 folder:
Open that file in Spyder, and you’ll see that we’ve given you the following strings:
s1 = 'Hickory Dickory Dock!'
s2 = 'The mouse ran up the clock.'
We have also given you the solution to the first puzzle.
Warmup
Run ps7pr1.py in Spyder, so that the strings s1 and s2 will be
available to you in the IPython console.
Next, enter the following method calls and other expressions from the console, and take note of the values that are returned:
>>> s1.upper()
>>> s1
>>> s2.lower()
>>> s2
>>> s2.count('t')
>>> s2.lower().count('t')
>>> s1.count('or')
>>> s1.split()
>>> s1.split('y')
>>> s1.upper().split('C')
>>> s1.replace('or', 'e')
>>> s1.replace('or', '')
>>> s2.lower().replace('th', 'm')
>>> s1
>>> s2
Make sure that the result of each method call makes sense, and perform
whatever additional calls are needed to ensure that you understand
what each of these methods does. You may also want to consult the
online documentation for Python’s str class.
The Puzzles
Your task is to add answers to ps7pr1.py for the remaining puzzles,
following the format that we’ve given you for puzzle 0.
Important
Each expression that you construct must:
- begin with either
s1ors2 - use one or more of the string methods that we covered in lecture (i.e., the ones that are included in the Warmup section above).
Because our goal is to practice using methods, your expressions may NOT use:
- indexing or slicing (e.g.,
s1[1]ors2[2:4]) - any operator (e.g., the
+operator)
Here are the puzzles:
-
Use
s2and one or more string methods to count all occurrences of the letter T (both upper-case and lower-case) ins2, and assign the count to the variableanswer0. The expected answer is 2. We’ve given you the code for this puzzle. -
Use
s1and one or more string methods to create the string'Hillory Dillory Doll!'Your answer for this and the remaining puzzles should follow the format that we’ve given you for puzzle 0. In other words, it should look like this:
# Puzzle 1
answer1 =
where you put the appropriate expression to the right of the assignment operator (
=). Please leave a blank line between puzzles to make things more readable. -
Use
s2and one or more string methods to create the list['Th', ' mous', ' ran up th', ' clock.']
Assign the result to the variable
answer2. -
Use
s1and one or more string methods to create the list['hi', 'ory di', 'ory do', '!']
Assign the result to the variable
answer3. -
Use
s1and one or more string methods to create the string'ORY ORY HOCK!'Assign the result to the variable
answer4. -
Use
s2and one or more string methods to create the list['TH', 'MOUS', 'RAN UP TH', 'CLOCK.']
Assign the result to the variable
answer5.Note: The only string in the list that includes any spaces is the third one (
'RAN UP TH').
Problem 2: Our Rectangle class revisited
25 points; pair-optional
This is the only problem from this assignment that you may complete with a partner. See the rules for working with a partner on pair-optional problems for details about how this type of collaboration must be structured.
In lecture this week, we are considering a class called Rectangle,
which serves as a blueprint for objects that represent rectangles. In
this problem, you will add one field and several methods to this
class.
-
Begin by downloading the following file, which includes the version of the
Rectangleclass that we used in lecture:Save the file in your folder for this assignment, and open it in Spyder. Make sure to review all of the existing code in this file.
(Note: two of the methods in this class will be discussed in the pre-lecture and lecture for Wednesday.)
-
Let’s say that we want each
Rectangleobject to include a new field calledunitthat stores a string specifying the unit of measurement (e.g.,'feet'or'cm') for theRectangle‘s dimensions.Update the
Rectangleconstructor so that it can be used to initialize the value of this newunitfield. After making the necessary changes, you should be able to do something like the following from the console:>>> r1 = Rectangle(10, 30, 'cm') >>> r1.unit result: 'cm'
Make sure that you:
-
Add a parameter to the header of the constructor for the new input.
-
Perform the necessary assignment within the constructor.
-
-
Add a method called
diagonalthat takes no inputs and computes and returns the length of the calledRectangleobject’s diagonal – i.e., the square root of the sum of the squares of theRectangle‘s height and width. For example:>>> r1 = Rectangle(30, 40, 'in') >>> r1.diagonal() result: 50.0
Notes:
-
Don’t forget to indent your new method so that it will be considered part of the
Rectangleclass. -
You should use the built-in
math.sqrtfunction to compute the necessary square root. We have already included animportstatement for themathmodule at the top ofrectangle.pyso that you will have access to this function.
-
-
The pre-lecture and lecture for Wednesday discuss a special method called
__repr__, which creates a string representation of an object that can be used when the object is printed or evaluated from the console.The existing
Rectangleversion of this method returns a string that is based solely on the height and width of the rectangle.Update the
__repr__method so that it includes the value of the newunitfield after each of the dimensions. For example:>>> r1 = Rectangle(10, 30, 'cm') >>> print(r1) 10 cm x 30 cm
-
The pre-lecture and lecture for Wednesday also discuss a special method called
__eq__that is used when two objects are compared using the==operator.The current
Rectangleversion of the__eq__method compares the heights and widths of theRectangleobjects and requires that the dimensions be identical.Update the
__eq__method so that twoRectangleobjects are considered equal if and only if both of the following conditions are true:-
they have the same value for the
unitsfield -
their areas are equal, regardless of whether their heights are widths are identical.
For example:
>>> r1 = Rectangle(30, 40, 'in')

>>> r2 = Rectangle(20, 60, 'in')

>>> r3 = Rectangle(20, 60, 'feet')

>>> r4 = Rectangle(30, 50, 'in')

>>> r1 == r2     # both have 'in' for unit and an area of 1200
result: True

>>> r2 == r3     # different units
result: False

>>> r1 == r4     # different areas
result: False
Important: For full credit, your
__eq__method must make use of the existingareamethod to compute the areas of the twoRectangleobjects. For example, to obtain the area of the called object, you can use the expressionself.area() -
-
Add a method called
larger_than(other)that takes anotherRectangleotheras a parameter and that returnsTrueif the calledRectangleobject (the object given byself) has a larger perimeter than the perimeter of theRectanglepassed in forother, andFalseotherwise.>>> r1 = Rectangle(30, 40, 'in') >>> r2 = Rectangle(20, 70, 'in') >>> r1.larger_than(r2) # 140 is not larger than 180 result: False >>> r2.larger_than(r1) # 180 *is* larger than 140 result: True
Important: For full credit, your
larger_thanmethod must make use of the existingperimetermethod to compute the perimeters of the twoRectangleobjects. For example, to obtain the area of the called object, you can use the expressionself.perimeter()Special case: If the two
Rectangleobjects have different units, the function should returnFalse, regardless of their perimeters. For example:>>> r1 = Rectangle(100, 40, 'in') >>> r2 = Rectangle(20, 70, 'feet') >>> r1.larger_than(r2) result: False
Submitting your work for Part I
Submit your ps7pr1.py and ps7pr2.py files under the assignment
labeled PS 7: Part I using these steps:
-
Click on the name of the assignment in the list of assignments. You should see a pop-up window with a box labeled DRAG & DROP. (If you don’t see it, click the Submit or Resubmit button at the bottom of the page.)
-
Add your files to the box labeled DRAG & DROP. You can either drag and drop the files from their folder into the box, or you can click on the box itself and browse for the files.
-
Click the Upload button.
-
You should see a box saying that your submission was successful. Click the
(x)button to close that box. -
The Autograder will perform some tests on your files. Once it is done, check the results to ensure that the tests were passed. If one or more of the tests did not pass, the name of that test will be in red, and there should be a message describing the failure. Based on those messages, make any necessary changes. Feel free to ask a staff member for help.
Note: You will not see a complete Autograder score when you submit. That is because additional tests for at least some of the problems will be run later, after the final deadline for the submission has passed. For such problems, it is important to realize that passing all of the initial tests does not necessarily mean that you will ultimately get full credit on the problem. You should always run your own tests to convince yourself that the logic of your solutions is correct.
-
If needed, use the Resubmit button at the bottom of the page to resubmit your work. Important: Every time that you make a submission, you should submit all of the files for that Gradescope assignment, even if some of them have not changed since your last submission.
-
Near the top of the page, click on the box labeled Code. Then click on the name of each file to view its contents. Check to make sure that the files contain the code that you want us to grade.
Important
-
It is your responsibility to ensure that the correct version of every file is on Gradescope before the final deadline. We will not accept any file after the submission window for a given assignment has closed, so please check your submissions carefully using the steps outlined above.
-
If you are unable to access Gradescope and there is enough time to do so, wait an hour or two and then try again. If you are unable to submit and it is close to the deadline, email your homework before the deadline to
cs111-staff@cs.bu.edu
Part II
Problem 3: Images as 2-D lists
30 points; individual-only
Getting started
Begin by downloading the following zip file:
ps7image.zip
Unzip this archive, and you should find a folder named ps7image,
and within it several files, including ps7pr3.py. Open that file
in Spyder, and put your work for this problem in that file.
You should not move any of the files out of the ps7image folder.
Keeping everything together will ensure that your functions are able to
make use of the image-processing module that we’ve provided.
Among the files in the ps7image folder are several PNG images that you
can use when testing your functions. They include the following:
test.png:

spam.png:
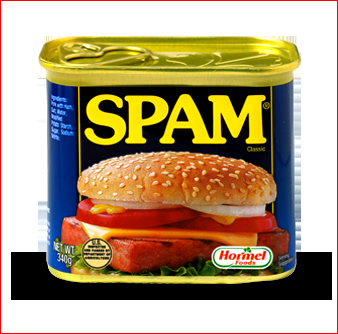
Important: Both of these images have a one-pixel border; test.png
has a blue border, and spam.png has a red one.
When you create a new image that is based on one of these images,
these borders should help you to ensure that you are transforming the
entire image.
Loading and saving pixels
At the top of ps7pr3.py, we’ve included import statements for the
following three functions from a separate file called hmcpng.py:
-
load_pixels(filename), which takes as input a stringfilenamethat specifies the name of a PNG image file, and that returns a 2-D list containing the pixels for that image -
save_pixels(pixels, filename), which takes a 2-D listpixelscontaining the pixels for an image and saves the corresponding PNG image to disk using the specifiedfilename(a string). -
compare_images(filename1, filename2), which takes two strings representing the names of PNG files and compares the two images to each other. We encourage you to use this function to check the results of your functions.
Notes
-
In Spyder, you may see warning symbols next to the lines that import the functions. You can safely ignore these warnings.
-
If you receive a
PermissionErrorthat stems from the import statements, you may need to adjust your computer’s settings. -
If you can’t get the provided functions to work on your computer, you can use Spyder on the virtual desktop. Instructions for using the virtual desktop can be found here.
In addition, we’ve given you two other functions:
-
create_green_image(height, width)that creates and returns a 2-D list of pixels withheightrows andwidthcolumns in which all of the pixels are colored green (i.e., have RGB values[0,255,0]). This is similar to thecreate_uniform_imagefunction from Lab 9. -
brightness(pixel), which you will use to compute the brightness of a pixel.
We demonstrated load_pixels and save_pixels in Lab
9. We also provided examples of manipulating
images represented as 2-D lists. We encourage you to review that
material from lab before proceeding.
Your tasks
-
Write a function
grayscale(pixels)that takes the 2-D listpixelscontaining pixels for an image, and that creates and returns a new 2-D list of pixels for an image that is a grayscale version of the original image.The pixels of your grayscale image should be based on the brightness of each pixel. The brightness of a pixel
[r,g,b]can be computed using this formula:(21*r + 72*g + 7*b) // 100
We’ve given you a helper function called
brightness()that you should use to make this computation.Once you have a pixel’s brightness, you should use it as the value for all three of the colors of the grayscale version of the pixel. For example, the pixel
[100,200,0]has a brightness of165, and thus it should be replaced by the pixel[165,165,165]in the grayscale version of the image.For example, if you do the following:
>>> pixels = load_pixels('spam.png')

>>> gray_spam = grayscale(pixels)

>>> save_pixels(gray_spam, 'gray_spam.png')
gray_spam.png saved.
you should obtain the following image:
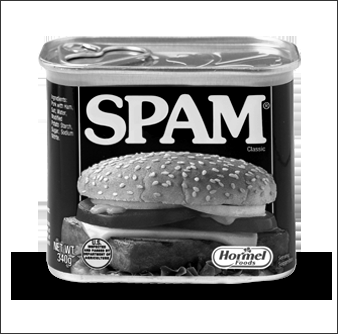
After saving the result of your function, you can double-click on the new PNG file in the
ps7_imagefolder to see the image that was produced. In addition, you should verify that the resulting image is correct by using the procedure explained below.Notes/hints:
-
Your function will need to create a new 2-D list of pixels with the same dimensions as
pixels. You can use thecreate_green_imagefunction that we’ve provided to create a new 2-D list of green pixels that you then modify. -
Your function should return the new 2-D list of pixels that it creates.
-
Important: The 2-D list created by
create_green_imagewill be filled with green pixels. If you see unexpected green pixels in your new image (e.g., at the borders of the image), there is a bug in your function that you will need to fix.
Verifying the produced image
In theps7imagefolder, we have included a PNG file for the expected result of each function that you will write.To verify the image produced by your
grayscale()function, you should do the following after executing the lines above:>>> compare_images('gray_spam.png', 'gray_expected.png') gray_spam.png and gray_expected.png are identical.If the image produced by your
grayscale()function is identical to the expected result, you will see the message shown above. Otherwise, you will see another message with details about the ways in which the two images differ. -
-
Write a function
left_right(pixels)that takes the 2-D listpixelscontaining pixels for an image, and that creates and returns a new 2-D list of pixels for an image in which the original image is “flipped” left to right. In other words, the left of the original image should now be on the right, and the right should now be on the left. For example, if you do the following:>>> pixels = load_pixels('spam.png') >>> lr = left_right(pixels) >>> save_pixels(lr, 'lr_spam.png') lr_spam.png saved.
you should obtain the following image:

To verify your image:
>>> compare_images('lr_spam.png', 'lr_expected.png')
lr_spam.png and lr_expected.png are identical.
Notes/hints:
-
Here again, you should use the
create_green_imagefunction to create a new 2-D list of green pixels that you then modify, and you should return the modified 2-D list. -
When computing the appropriate coordinates for a flipped pixel, don’t forget that valid
(r,c)coordinates for an image of heighthand widthware the following:0 ≤ r ≤ h - 1
0 ≤ c ≤ w - 1Given these ranges, where should a pixel from the leftmost column of a given row end up in the flipped image? Where should a pixel from the second column of a given row end up? Where should a pixel from the
cth column of the original image end up?
-
-
Write a function
reflect(pixels)that takes the 2-D listpixelscontaining pixels for an image, and that creates and returns a new 2-D list of pixels for an image in which the bottom half of original image is replaced by a “reflection” of the top half. In other words, the bottom half of the pixels in each column should be replaced by the reversed top half of the pixels from the same column.For example, if you do the following:
>>> pixels = load_pixels('spam.png')

>>> reflected = reflect(pixels)

>>> save_pixels(reflected, 'refl_spam.png')
refl_spam.png saved.
you should obtain the following image:

To verify your image:
>>> compare_images('refl_spam.png', 'refl_expected.png')
refl_spam.png and refl_expected.png are identical.
Important: Your function should also work if the image has an odd number of rows. For such images, the middle row in the reflected image should contain the same pixels as the middle row in the original image. For example, the following image has an odd number of rows:

If you test your function on this image:
>>> pixels = load_pixels('bu.png')

>>> reflected = reflect(pixels)

>>> save_pixels(reflected, 'refl_bu.png')
refl_bu.png saved.
you should obtain the following image:

To verify your image:
>>> compare_images('refl_bu.png', 'refl_bu_expected.png')
refl_bu.png and refl_bu_expected.png are identical.
Notes/hints:
-
Here again, you should use the
create_green_imagefunction to create a new 2-D list of green pixels that you then modify, and you should return the modified 2-D list. -
When computing the appropriate coordinates for a reflected pixel, don’t forget that valid
(r,c)coordinates for an image of heighthand widthware the following:0 ≤ r ≤ h - 1
0 ≤ c ≤ w - 1Given these ranges, where should a pixel from the topmost row of a given column be reflected on the bottom half? Where should a pixel from the second row of a given column be reflected? Where should a pixel from the
rth row of the original image be reflected?
-
-
Write a function
cut(pixels, rmin, rmax, cmin, cmax)that takes the 2-D listpixelscontaining pixels for an image, and that creates and returns a new 2-D list that represents the portion of the original image that is specified by the other four parameters. The cut-out portion of the image should consist of the pixels that fall in the intersection of- the rows of pixels that begin with row
rminand go up to but not including rowrmax - the columns of pixels that begin with column
cminand go up to but not including columncmax.
For example, if you do the following:
>>> pixels = load_pixels('spam.png')

>>> cutout = cut(pixels, 90, 150, 75, 275)

>>> save_pixels(cutout, 'cutout_spam.png')
cutout_spam.png saved.
you should obtain the following image:

To verify your image:
>>> compare_images('cutout_spam.png', 'cutout_expected.png')
cutout_spam.png and cutout_expected.png are identical.
Notes/hints:
-
Here again, your function will need to create a new 2-D list of pixels, and you can use the
create_green_image()function for that purpose. Compute the dimensions of the new image from the inputs to the function. -
Don’t forget that the
rmaxandcmaxparameters are exclusive, which means that the extracted image should not include pixels from rowrmaxor columncmaxof the original image. This is similar to what happens when you slice a string or list, and it should make it easier to compute the dimensions of the image. -
One way to solve this problem is to use nested loops to iterate over the rows and columns of the newly created 2-D list–the one that represents the cut-out image. You can then perform the necessary computations on your loop variables
randcto determine the cooordinates of the pixel from the original image that you should use for the pixel at position(r, c)in the new image. Use concrete cases to determine the appropriate computations.
- the rows of pixels that begin with row
Problem 4: Creating a simple database program using file processing
25 points; individual-only
Background information
Your task is to create a simple database program that provides access
to historical population data for the most populous cities in the
United States. The source of our data is a site called
peakbagger.com.
Format of the data file
Your program will read from a file like
cities.txt — a comma-delimited text
file that contains the information needed for the database.
Each line of the file represents one record of the database, and each record has information about a particular city’s population in a particular year.
More specifically, each record has the following five fields:
- the year in which the population was recorded
- the rank of the city in that year, where a rank of 1 indicates the city with the largest population, a rank of 2 indicates the city with the second largest population, and so on.
- the name of the city itself (e.g., “Boston”)
- the abbreviation of the state in which the city is found (e.g., “MA”)
- the approximate population of the city in that year as a multiple
of 1000; for example, a population value of
33.1represents a total population of33,100. (Strictly speaking, these populations are for the metropolitan areas surrounding each city.)
Because the file is a CSV file, the individual fields are separated by commas.
For example, here are the first three lines of the file that we’ve given you:
1790,1,Philadelphia,PA,44.1
1790,2,New York,NY,33.1
1790,3,Boston,MA,18.3
All of these records are for the year 1790. The first record indicates that the city with the largest population in 1790 (and thus a rank of 1) was Philadelphia, PA, which had a population of 44,100. The second record indicates that the city with the second largest population in 1790 (and thus a rank of 2) was New York, NY, which had a population of 33,100. The third record indicates that the city with the third largest population in 1790 (and thus a rank of 3) was Boston, MA, which had a population of 18,300.
Your tasks
Here are the steps that you should take:
-
Download the following files:
-
ps7pr4.py - a Python file that includes a helper function that you will use in your work on this problem.
-
cities.txt- an example of the type of data file that your program should be able to process.
Make sure that you put both files in your
ps7folder. -
-
In Spyder, open the
ps7pr4.pyfile that you downloaded above. -
Write a function
find_results(filename, city, state)that takes three strings as inputs:filename, which is the name of the data filecity, which is the name of the city that we are looking for in the data filestate, which is the state abbreviation for the state we are looking for.
This function should do the following:
-
open a connection to the data file with the specified
filename -
use a loop to process the file line by line, just as we did in lecture
-
inside the loop, use either slicing or the
stripmethod to remove the newline character from the end of each line -
use the
splitmethod to break each line into a list of fields -
determine which lines are a match for the specified
cityandstatevalues; if a given line is a match, call the providedoutput_formattedhelper function, passing in the year, rank and population fields.output_formattedwill take care of formatting and printing the appropriate line of results for the field values that you pass in. Note:find_resultsshould not print the results itself. Rather, it should make the necessary calls tooutput_formattedto print them. -
print an error message if no results for the specified
cityandstatevalues are found in the data file -
close the connection to the data file.
The function should not return a value.
Here are some examples of how this function should work:
>>> find_results('cities.txt', 'Boston', 'MA')
1790    3         18,300
1810    4         38,700
1830    3         85,600
1850    3        308,000
1870    3        501,000
1890    4        818,000
1910    4      1,213,000
1930    6      1,479,000
1950    6      2,301,000
1970    7      2,703,000
1990    9      3,355,000
2010    11     4,407,000

>>> find_results('cities.txt', 'Louisville', 'KY')
1830    16        10,300
1850    13        61,000
1870    13       129,000
1890    18       183,000

>>> find_results('cities.txt', 'Portland', 'OR')
no results found for Portland OR
Note: You do not need to worry about putting the results into chronological order. You may assume that the records in the data file are ordered by year, and thus you can simply print the results in the order in which you encounter them in the file.
-
Write a function called
mainthat will be used to start the program. This function should not take any inputs, and it should not return a value.Like the
mainfunction in Lab 8, Tasks 2 and 3 and thettsfunction in PS 6, Problem 4, yourmainfunction should include the user-interaction loop and theinputstatements that get the necessary values from the user.First,
main()should begin by using aninputstatement to get the name of the data file from the user, and you should assign that filename to an appropriately named variable. This step should be performed only once, at the very beginning ofmain().Next, your
main()function should use a loop to repeatedly do the following:-
Use an
inputstatement to get the name of a city from the user. If the user enters the word'quit', the program should end, which you can do by returning frommain(). -
If the user does not enter
quitfor the city name,main()should use a secondinputstatement to get the city’s two-letter state abbreviation, and it should call yourfind_results()function to perform the necessary file-processing for the specified city and state. -
After calling
find_results(),main()should print a blank line.
Your
main()function should then repeat these steps until the user enters'quit'. -
In general, your program should behave in ways that are consistent with the sample run that is available here.
Running and testing your program
To run the program, first run your ps7pr4.py file
in Spyder, and then make the following function call from the console:
>>> main()
Test your program for a variety of different cases. Make sure that its behavior matches the behavior found in the sample run.
In addition, make sure that your program works for any CSV file that
has the same format as cities.txt. In other words, your program
should not assume that the name of the data file is cities.txt, but
rather it should use whatever filename is entered by the user. To ensure
that this is the case, you can test your program using the following
data file: cities2.txt
This file is similar to cities.txt, but it only includes data for
years after 1900, so using it will lead to fewer lines of results for
cities like Boston, MA.
Submitting your work for Part II
Login to Gradescope by clicking the link in the left-hand navigation bar, and click on the box for CS 111.
Submit your ps7pr3.py and ps7pr4.py files under the assignment
labeled PS 7: Part II using these steps:
-
Click on the name of the assignment in the list of assignments. You should see a pop-up window with a box labeled DRAG & DROP. (If you don’t see it, click the Submit or Resubmit button at the bottom of the page.)
-
Add your files to the box labeled DRAG & DROP. You can either drag and drop the files from their folder into the box, or you can click on the box itself and browse for the files.
-
Click the Upload button.
-
You should see a box saying that your submission was successful. Click the
(x)button to close that box. -
The Autograder will perform some tests on your files. Once it is done, check the results to ensure that the tests were passed. If one or more of the tests did not pass, the name of that test will be in red, and there should be a message describing the failure. Based on those messages, make any necessary changes. Feel free to ask a staff member for help.
Note: You will not see a complete Autograder score when you submit. That is because additional tests for at least some of the problems will be run later, after the final deadline for the submission has passed. For such problems, it is important to realize that passing all of the initial tests does not necessarily mean that you will ultimately get full credit on the problem. You should always run your own tests to convince yourself that the logic of your solutions is correct.
-
If needed, use the Resubmit button at the bottom of the page to resubmit your work. Important: Every time that you make a submission, you should submit all of the files for that Gradescope assignment, even if some of them have not changed since your last submission.
-
Near the top of the page, click on the box labeled Code. Then click on the name of each file to view its contents. Check to make sure that the files contain the code that you want us to grade.
Important
-
It is your responsibility to ensure that the correct version of every file is on Gradescope before the final deadline. We will not accept any file after the submission window for a given assignment has closed, so please check your submissions carefully using the steps outlined above.
-
If you are unable to access Gradescope and there is enough time to do so, wait an hour or two and then try again. If you are unable to submit and it is close to the deadline, email your homework before the deadline to
cs111-staff@cs.bu.edu
Last updated on April 13, 2026.