 |
We now provide step-by-step instructions on creating a topology using the BRITE GUI.
The first step is to start the GUI by typing the following command at the prompt:
\$ startGUI
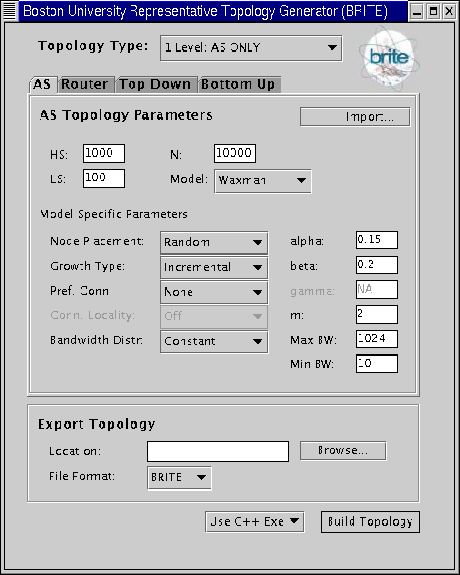
A window as shown in Figure 8 will pop up.
To create a new Topology, select in Topology Type the kind of topology that you'd like to create first. You may select one of the options shown in Figure 9, namely, Flat Router-Level only, Flat AS-Level only or Hierarchical topologies. Although the interface shows the parameters available for other models as well, only those applicable to the selected model type will be enabled.
Next, specify the topology parameters. A complete description of these parameters is given in Section 3.8. BRITE comes with two models: Waxman and BarabásiAlbert for both AS-level and router-level topologies. You may select one of these. You may also import an existing topology file and use it in combination with other topologies in a Hierarchical Model. To do this click on the Import button and a window will pop up from which you will be able to select the desired file to import.
Once you have selected a model, you may edit the default model-specific parameters. In Figure 8 the selected topology type is flat AS-level and the parameters in the middle section of the window are parameters passed to the ASWaxman model.
In the Export file section of the window, specify the file and format you want to export the generated topology to. In the current distribution of BRITE only BRITE's output format is supported but soon there will be exporting capabilities for NS and SSF formats. See 4.3 for details on BRITE's output format.
Finally, select the version of the BRITE generation engine to use: C++ or Java. Click Build Topology. A status window, as shown in figure 10, should appear that will detail the topology generation process. You may at a later time modify the configuration file that the GUI generates, GUI_GEN.conf, and generate similar topologies.